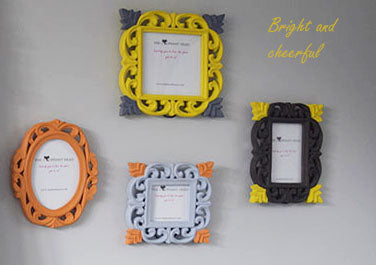
As many of us continue to spend the majority of our time at home, you might have started to notice things about your home that you wouldn't usually. Perhaps you're looking at ideas to spruce up your home or are looking for new crafting ideas for yourself or the kids to do in their Summer holidays? Our recently launched selection of do-it-yourself carved wooden frames might just be the answer for you.
If you are going to paint a picture frame, choosing the paint and preparing the frame to be painted are your main considerations. After all your photographs—especially those fancy shots and much-loved pieces of art—deserve better than a boring store-bought frame. Here we'll show you a few ways to finish your DIY frames.
First - Prepare your frame
- Remove the backing and the plexiglass window of the frame gently.
- Sand down any rough edges and the carved crevices of the frame.
- Clean the frame thoroughly as you will want to work with a smooth, dust-free surface. Use a damp cloth or mild cleanser if needed.
- Make sure the frame is dry after cleaning.
- Once the frame is dry and prepped for paint, use painters tape on any parts of the frame you don't want to paint.
- Lay down some newspaper, or a canvas drop cloth to paint the frame over.
Paint with chalk paint
- Browse through the inspiration pages of paint manufacturers, for colour ideas, some good inspiration pages can be found on the Annie Sloan website and Frenchic TV.
- Choose the chalk paint and any contrasting paint you like, there are lots of good chalk paint brands and you can buy some online or at your local home decor stores. Wilko, B&Q, and Homebase in the UK, stock basic chalk paint colours. For any specific colours, you may need to check with the stockists or you can find them online at Annie Sloan, Rustoleum or Frenchic. Depending on the number of picture frames you're painting, you may be able to get away with sample pot sizes.
- Choose the wax type for the finish you wish to see. The above websites have some good examples of wax finishes. Chalk paint is prone to smudging and scuffing off if it is not sealed with wax or some other protective finish.
- Depending on the type of chalk paint you choose, you may need to mix your paint with water. For this follow the instructions on the tin and work to get a medium consistency. Experiment with a consistency that works best for you.
- Once you have the consistency to your liking, paint a thin even coat of chalk paint, letting it dry completely before proceeding.
- Be careful that you clean up any paint drips before they dry. The edges are especially prone to dripping paint, but you can minimize this by painting on thinner coats and wiping any excess paint away right away. Some drips form after the paint settles in a bit, so wait for a bit and wipe off any excess paint you see right away.
- If you want a distressed picture frame, buff off any paint with a sand block to expose the paint or wood below. No two frames will look alike, but if you want the ageing to look natural, sand the corners, edges, and high points only.
- Finally, finish with a wax sealant.
Chalk paints are also available as spray cans- if you're going to use this method to paint then follow instructions on the can to achieve an even finish. They probably instruct you to maintain a certain distance while spray painting in order to achieve a smooth, even finish. We also cover this in our guide to spray paint below.
Useful Tip: if you're new to this, it is best to experiment with any paint on the back of the frame first, until you get a hang of the technique and then you're ready to tackle the rest of the frame.
Paint using Spray Paint
Spray paint is a great option that covers more surface area quickly and dries much faster than paint applied by hand. If prepped right, there's also less to clean up afterwards.
- Choose your paint. Spray paints come in a variety of options like high gloss, satin, and metallic.
- Browse online for some ideas and inspiration. The following guide covers how to 'Transform Old Frames/Furniture with Spray Paint and Gold Leaf'.
- Work in an open or well-ventilated area. Spray paint vapours are toxic, so it’s very important that you work in an open or well-ventilated area while you are using it.
- Spray paint can also be harsh on your eyes and skin, so it’s best to wear gloves or wash your hands immediately after using it. Cover your nose and mouth with a mask to prevent inhalation of the paint fumes.
- If you’re spray painting outside, be mindful of the wind direction so the paint goes on the frame and not somewhere else.
- Apply a coat of spray paint primer to the frame. Shake the bottle well and keep the nozzle about 6–12 inches (15–30 cm) away from the frame. Spray in short bursts and keep the can in constant motion for an even application.
- Follow instructions on the can for drying times, before applying more coats of paint.
- If the original paint is still showing through the primer, you can apply a second coat.
Paint with a hand brush using a latex or an oil-based paint
- Select a latex or oil-based paint for a beautiful finish. We wouldn't recommend using watercolours on a wooden frame as it may result in the paint not soaking into or adhering well to the wood.
- Apply a base layer of primer to the frame so your paint will stick better. Cover the front, back, and sides of the frame and let the primer dry completely.
- Before applying the paint, mix the paint thoroughly with a stirrer as the ingredients can often separate. Mix it to the right colour and consistency.
- Paint a small portion at the back of the frame and let it dry, to ensure it's the right shade you're after. Sometimes paint samples can look a little different than the actual paint, so it’s always a good idea to check first!
- To have a smooth finish, paint in the same direction using even strokes.
- Add a second coat if needed, but only after the first coat has fully dried. Drying times can often be found on the paint can.
Useful Tip: Clean your brushes with the right solvent before putting them away. You can use water to clean water-based paints and mineral spirits for oil-based paints from brushes.
Think outside the box!
When it comes to painting your picture frames, why not let your creativity take charge. Think outside the box, use nature to inspire you, or go for the glam look... whatever your style and inspiration, picture frames never go out of style. They make good gifts for family and friends and they are often an inexpensive way to give your home a new look without much effort.
So what are you waiting for? Grab some DIY frames, stock up on some supplies and paints, and get started...
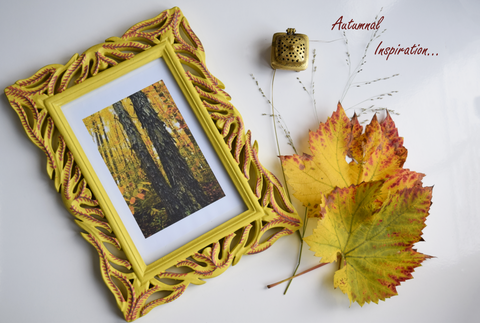
Pictured above~ Hand-painted yellow and brown fern picture frame
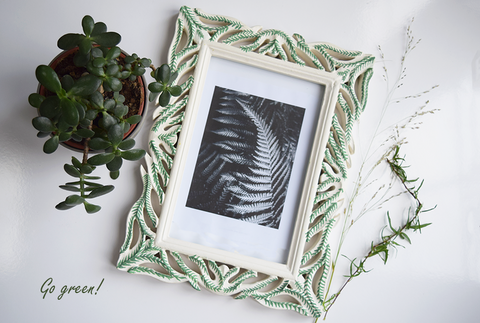
Pictured above~ Hand-painted white and green fern picture frame